Plu size DIY Kimono, sewing without a pattern
I've been admiring kimono cardigans online for weeks now, and wanting to add at least one to my wardrobe. (I'm using the term "kimono" in the way it's used in current fashion -- a simple drapey jacket, duster or coat, largely constructed of rectangles -- rather than in the authentic Japanese way).

There are lots of kimono sewing tutorials out there but none especially for plus sizes. (I was especially amused by the one that cuts a T-shaped piece of fabric out of one width of material -- after leaving enough room for my magnificent body, this would give me a kimono with 3 inch long sleeves :))
This one is probably closest to the tutorial on Elle Apparel, although I think mine makes putting on the sleeves easier :) And mine doesn't have an extra shirt tail of fabric on the back (although that might not be a bad idea ...)
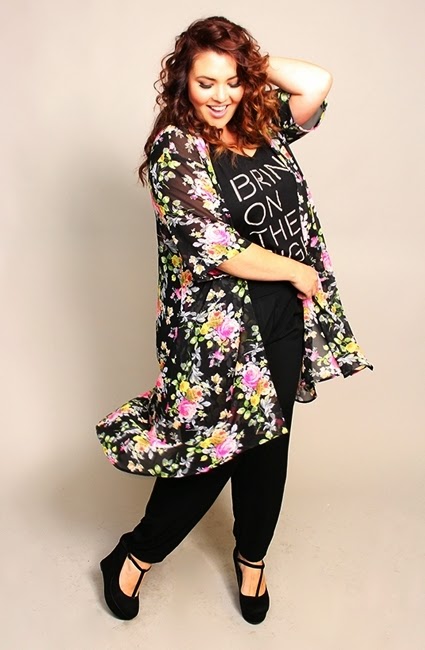
I had about three metres of a really lovely, slightly crinkled fine woven fabric in my stash, in a rich, orange, grey, green and black paisley print. I had bought it last season for a dress, but decided that it would be perfect for my first kimono! It's definitely got the exotic, boho feel I want.
This kind of kimono is made of 5 rectangles -- one big one for the back, another equal one, split vertically for the two front sides and two equal, smaller ones for the sleeves.
I'm a US 3X or 22/24 so this kimono is made to fit me. It would actually work on a 4X, size 26 as well. It's roomy :)
1. Cut or rip a length of fabric that equals the length of garment you want. I used a 36" length. I took 2.5 inches off each side giving me a rectangle measuring 36" long by 40" wide (I originally thought I could use the full width of the fabric -- this gave me a really enormous and unflatteringly wide kimono :))
2. Cut or rip a second equal length and width, then cut or rip it in half vertically giving you two rectangles 36" long by 20" wide.

3. Sew the back to the fronts at the shoulders, leaving room for your neck. I left 4" on each side of the centre front opening.

I ripped a 16' wide strip of fabric from my left over piece and then ripped it in half giving me two 16" by 22.5" rectangles. These will be my sleeves.
5. I found the centre of these rectangles and put a pin in place to remind me where that centre was (you could also make a little notch in the fabric). I pinned the sleeves to the kimono, matching the centre of the sleeve to the shoulder seam, and sewed the sleeves on.


There are lots of kimono sewing tutorials out there but none especially for plus sizes. (I was especially amused by the one that cuts a T-shaped piece of fabric out of one width of material -- after leaving enough room for my magnificent body, this would give me a kimono with 3 inch long sleeves :))
This one is probably closest to the tutorial on Elle Apparel, although I think mine makes putting on the sleeves easier :) And mine doesn't have an extra shirt tail of fabric on the back (although that might not be a bad idea ...)
I had about three metres of a really lovely, slightly crinkled fine woven fabric in my stash, in a rich, orange, grey, green and black paisley print. I had bought it last season for a dress, but decided that it would be perfect for my first kimono! It's definitely got the exotic, boho feel I want.
 |
| Love this paisley pattern! The main colour is a super-saturated dark orange that's only a few steps from a tomato red. |
I'm a US 3X or 22/24 so this kimono is made to fit me. It would actually work on a 4X, size 26 as well. It's roomy :)
1. Cut or rip a length of fabric that equals the length of garment you want. I used a 36" length. I took 2.5 inches off each side giving me a rectangle measuring 36" long by 40" wide (I originally thought I could use the full width of the fabric -- this gave me a really enormous and unflatteringly wide kimono :))
2. Cut or rip a second equal length and width, then cut or rip it in half vertically giving you two rectangles 36" long by 20" wide.
I ripped a 16' wide strip of fabric from my left over piece and then ripped it in half giving me two 16" by 22.5" rectangles. These will be my sleeves.
5. I found the centre of these rectangles and put a pin in place to remind me where that centre was (you could also make a little notch in the fabric). I pinned the sleeves to the kimono, matching the centre of the sleeve to the shoulder seam, and sewed the sleeves on.
I then turned the sleeves out.
Folding the kimono in half along the shoulder seam, right sides together, I sewed the bottom of the sleeves together, then turned the corner and sewed the side seam of the kimono.
I tried on the kimono at this point, danced around for a while and and then hemmed the sleeves and the bottom edges.
8. The last edge to finish is the centre front/neck. You could shape this edge and then bind it with either self binding or contrast. You could make a facing. Or you could do what I did: I turned in the front edge from the side of the neck opening to the centre front to create a straight line and trimmed off the excess fabric. I then turned in the edge twice to contain the raw edge and hemmed all the way around the front opening and back of the neck. After pressing, this looked just fine to me.
Here's how it looks at the end of today. I'm going to buy some fringed trim for the bottom edge, partly to give it a little weight (that will bring out the drapey-ness of the fabric) and partly because it looks extra bohemian that way!
Comments
I stumbled across this post just googling Kimono, not even considering MAKING one...but now I need to search your blog more to see if have any other projects that look do-able by me and you-know-who.
Bettye
https://fashionschlub.com
for us plus size women.
Can’t tell you how happy I was when I found you !!
Lots of hugs and good wishes!!
Keep posting sewing ! I’m just learning to
sew cloths. It’s been really hard to try
and teach myself. With ppl like you
to help me along I may just get something made!!
made it in the bigger size . It is not easy to find patterns for larger ladies
SHORT side, so being able to make the length to fit me works so much better than the
patterns on sale, or the premade kimonos (they are about floor length on me!). I am
saving this tutorial and am on my way to fabric store this week. Thanks again.
Being overweight, I like to square off my belly with big shirts over tank tops. It too hot during the day or outside for blouses. This will work great for evening, airconditioned meeting halls… I’m using Cotton, so being big is a must (no stretch)
Yup, this pattern will do perfectly.